Bathroom walls are often the most overlooked surface in a home renovation. Homeowners pour budget into vanities, fixtures, and tile floors, then slap on a coat of beige paint and call it done. But bare walls in a humid, high-traffic space like a bathroom are a missed opportunity. Thoughtful bath wall decor adds personality, protects surfaces from moisture damage, and can even improve resale value. Whether working with a cramped powder room or a sprawling primary bath, the right wall treatments and accents turn a utilitarian space into a room someone actually wants to spend time in.
Table of Contents
ToggleKey Takeaways
- Bath wall decor protects bathroom surfaces from moisture damage while adding personality and potentially increasing home resale value.
- Popular bath wall decor styles—from modern minimalist to coastal and spa-inspired designs—can transform utilitarian bathrooms into inviting retreat spaces.
- Moisture-resistant materials like glazed tile, sealed wood paneling, protected artwork, and tempered glass mirrors are essential for durability in humid bathroom environments.
- Proper installation requires locating studs, using appropriate anchors for drywall or tile, and sealing joints with silicone caulk to prevent water damage.
- Budget-friendly bath wall decor options include peel-and-stick tile, DIY floating shelves from reclaimed wood, stenciled accent walls, and repurposed architectural salvage.
Why Bath Wall Decor Matters More Than You Think
Bathrooms face conditions no other room in the house deals with: steam, splashes, humidity swings, and ventilation challenges. Bare drywall or builder-grade paint degrades faster in these environments. Strategic wall decor, whether it’s moisture-resistant paneling, sealed artwork, or tile wainscoting, adds a protective layer that extends the life of the substrate beneath.
From a design standpoint, walls are the largest visual plane in any bathroom. Leaving them blank wastes prime real estate. A well-chosen piece of wall art, a floating shelf with greenery, or a statement mirror can anchor the room’s aesthetic and make the space feel intentional rather than generic.
Finally, bathrooms are increasingly viewed as retreat spaces rather than just functional zones. Homeowners who invest in relaxing bath accessories understand that ambiance matters. Wall decor contributes to that spa-like experience, especially in primary baths where morning routines and evening wind-downs happen daily.
Popular Bath Wall Decor Styles to Match Your Vision
Modern Minimalist Bathroom Walls
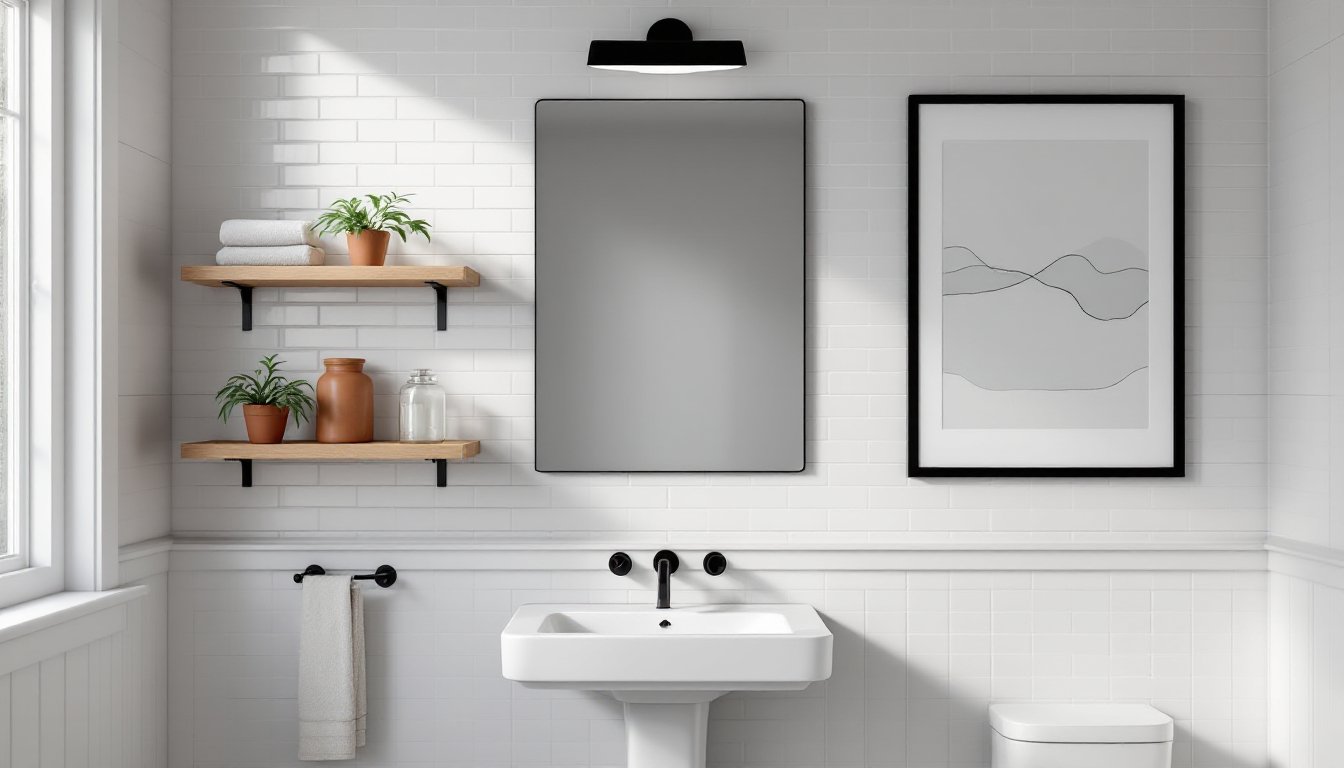
Modern minimalist bathrooms prioritize clean lines, neutral palettes, and restrained ornamentation. Wall decor in this style typically includes large-format tiles (12″ × 24″ or bigger), floating shelves in matte black or natural wood, and frameless mirrors. Artwork, if present, tends toward abstract prints in black frames or simple line drawings.
Materials like porcelain slab panels (which mimic marble or concrete without grout lines) and shiplap painted in flat white or gray are common. The key is to let negative space breathe. Don’t clutter walls with multiple small items, one or two statement pieces are enough. Professionals designing minimalist baths often reference platforms like Remodelista for sourcing curated, understated fixtures and finishes.
Coastal and Spa-Inspired Designs
Coastal and spa themes lean into natural textures, soft blues, greens, and whites, and organic materials. Wall decor here might include reclaimed wood accent walls, beadboard wainscoting, or pebble tile mosaics. Framed coastal photography, driftwood shelving, and woven baskets mounted as wall art all reinforce the theme.
For a spa vibe, consider vertical gardens using moisture-loving plants like pothos or ferns in wall-mounted planters. Bamboo or teak wall panels add warmth without feeling heavy. These styles work especially well in bathrooms with good natural light and ventilation. Homeowners tackling small powder room updates can borrow coastal design tricks, like vertical stripes or light-reflective finishes, to make tight quarters feel more open.
Best Materials and Decor Types for Bathroom Walls
Bathrooms demand materials that can handle consistent moisture and occasional direct water contact, especially near tubs and showers. Here’s what holds up:
Tile: Ceramic and porcelain tile remain the gold standard for wet zones. Glazed finishes resist staining and are easy to clean. For decorative impact, consider subway tile in non-traditional layouts (herringbone, vertical stack) or encaustic-patterned tiles as an accent band. Those exploring pattern options can review tile layout strategies to understand how grout spacing and orientation affect the final look.
Paneling and Wainscoting: PVC beadboard or composite wainscoting works well in powder rooms and guest baths where splashing is minimal. Wood wainscoting is possible if sealed with marine-grade polyurethane or exterior-grade paint, but it’s not recommended in full baths without excellent ventilation.
Artwork and Prints: Use sealed canvas prints or artwork behind acrylic or glass to protect from humidity. Avoid unframed paper prints, they’ll warp. Metal wall art and powder-coated steel pieces hold up better than unsealed wood or fabric.
Mirrors and Shelving: Large mirrors amplify light and make small baths feel larger. Floating shelves (metal brackets with sealed wood or tempered glass) provide display space without eating into floor area. Keep weight loads reasonable, most drywall anchors are rated for 20–50 lbs depending on type, but locating studs (typically 16″ on center) gives the strongest hold.
Safety note: Always use tempered or laminated glass for shelving and any glass decor items mounted above head height. Standard glass can shatter into sharp shards if it falls.
Step-by-Step Guide to Installing Your Bath Wall Decor
Tools & Materials:
- Stud finder (magnetic or electronic)
- Level (24″ or laser level)
- Drill/driver with bits for pilot holes
- Wall anchors (toggle bolts for drywall, masonry anchors for tile)
- Painter’s tape
- Pencil
- Safety glasses
Step 1: Plan Layout and Mark Locations
Lay out the arrangement on the floor or use painter’s tape on the wall to visualize spacing. Measure from fixed reference points (top of vanity, centerline of mirror). Mark anchor points lightly with pencil.
Step 2: Locate Studs
Use a stud finder to locate framing. Standard wood studs are 1.5″ × 3.5″ (nominal 2×4) and spaced 16″ on center in most residential construction. Metal studs are common in commercial or newer builds, use self-tapping screws rated for metal framing.
Step 3: Drill Pilot Holes
For items under 10 lbs, plastic expansion anchors work in drywall. Heavier items (floating shelves, large mirrors) need toggle bolts or mounting directly into studs. When drilling into tile, use a carbide-tipped masonry bit and start at low speed with light pressure to avoid cracking the glaze. Wear safety glasses, tile chips are sharp.
Step 4: Install Hardware and Hang Decor
Insert anchors, attach brackets or hooks, and hang decor. Use a level to confirm alignment before fully tightening fasteners. For multi-piece gallery walls, start with the center piece and work outward.
Step 5: Seal Edges (if Applicable)
If installing paneling or wainscoting in a damp area, run a bead of clear silicone caulk along joints where the material meets tile or tub surrounds. This prevents water from wicking behind the surface.
Pro tip: In rental situations or when avoiding wall damage, adhesive mounting strips (rated for the item’s weight) or tension rods with hanging clips offer no-drill alternatives for lightweight decor.
Creative DIY Bath Wall Decor Ideas on a Budget
Peel-and-Stick Tile or Wallpaper: Removable adhesive tile (often vinyl or gel) mimics the look of ceramic subway tile or patterned cement tile without the grout work. It’s not suitable for direct shower spray but works in powder rooms and on accent walls. Quality varies, look for products with strong adhesive backing and UV resistance to prevent fading. Designers on Houzz often showcase budget-friendly peel-and-stick makeovers that hold up in real-world use.
DIY Floating Shelf from Reclaimed Wood: Source a 1×8 or 1×10 board (actual dimensions 0.75″ × 7.25″ or 9.25″), cut to length, sand smooth, and seal with water-based polyurethane. Mount with hidden bracket hardware or pipe brackets for an industrial look. Total cost: under $30 for a 36″ shelf.
Frame Vintage Mirrors or Prints: Thrift stores and estate sales offer inexpensive mirrors and prints. Spray-paint frames in matte black, brushed gold, or any color that matches the bathroom palette. Seal paper prints with a clear acrylic sealer spray before framing to add moisture resistance.
Stenciled Accent Wall: Use a stencil and exterior-grade paint to create a patterned feature wall. Moroccan, geometric, or botanical stencils are widely available. Work in small sections, use low-tack painter’s tape to secure the stencil, and apply paint with a foam roller or stencil brush to minimize bleed. Bloggers at Addicted 2 Decorating have documented successful bathroom stencil projects with step-by-step photos.
Open Shelving with Styled Accessories: Install 2–3 narrow shelves and style them with rolled towels, small potted plants (pothos, snake plant, or air plants), and decorative jars. This approach adds function and visual interest without a big material investment. Keep items cohesive in color or texture to avoid a cluttered look.
Repurposed Architectural Salvage: Old window frames, shutters, or corbels can be mounted as wall art or shelf brackets. Clean, prime, and seal any salvaged wood to prevent mold or warping in humid conditions.