An outdoor kitchen positioned next to a pool transforms a backyard into a functional entertainment zone where cooking, dining, and swimming happen within steps of each other. This setup eliminates the back-and-forth between indoor cooking and outdoor activities, keeping the host in the middle of the action. But building next to water requires careful planning, from material selection to electrical safety and code compliance. Whether starting from scratch or upgrading an existing poolside space, understanding the design, safety, and structural considerations upfront will save time, money, and headaches down the road.
Table of Contents
ToggleKey Takeaways
- An outdoor kitchen next to a pool eliminates back-and-forth trips between indoor and outdoor spaces, keeping hosts centrally positioned for entertaining while preventing wet footprints inside the house.
- Water-resistant materials are essential—use stainless steel, granite, marine-grade cabinets, and slip-resistant flooring to withstand chlorine vapor, moisture, and temperature fluctuations in a poolside environment.
- Building codes require a minimum 5-to-10-foot setback from the pool edge for structures with electrical or gas connections, and all outlets within 20 feet of water must be GFCI-protected to prevent electrical hazards.
- A poolside kitchen increases property value and appeals to buyers seeking move-in-ready outdoor living spaces, making it a smart investment in home resale potential.
- Budget flexibility ranges from $3,000–$7,000 for DIY-friendly modular setups with basic appliances to $15,000–$50,000+ for professionally installed full-featured outdoor kitchens with premium finishes.
- Gas line installation, electrical wiring, and plumbing for sinks must be handled by licensed professionals in most jurisdictions—DIY work is unsafe, violates codes, and may void homeowner’s insurance.
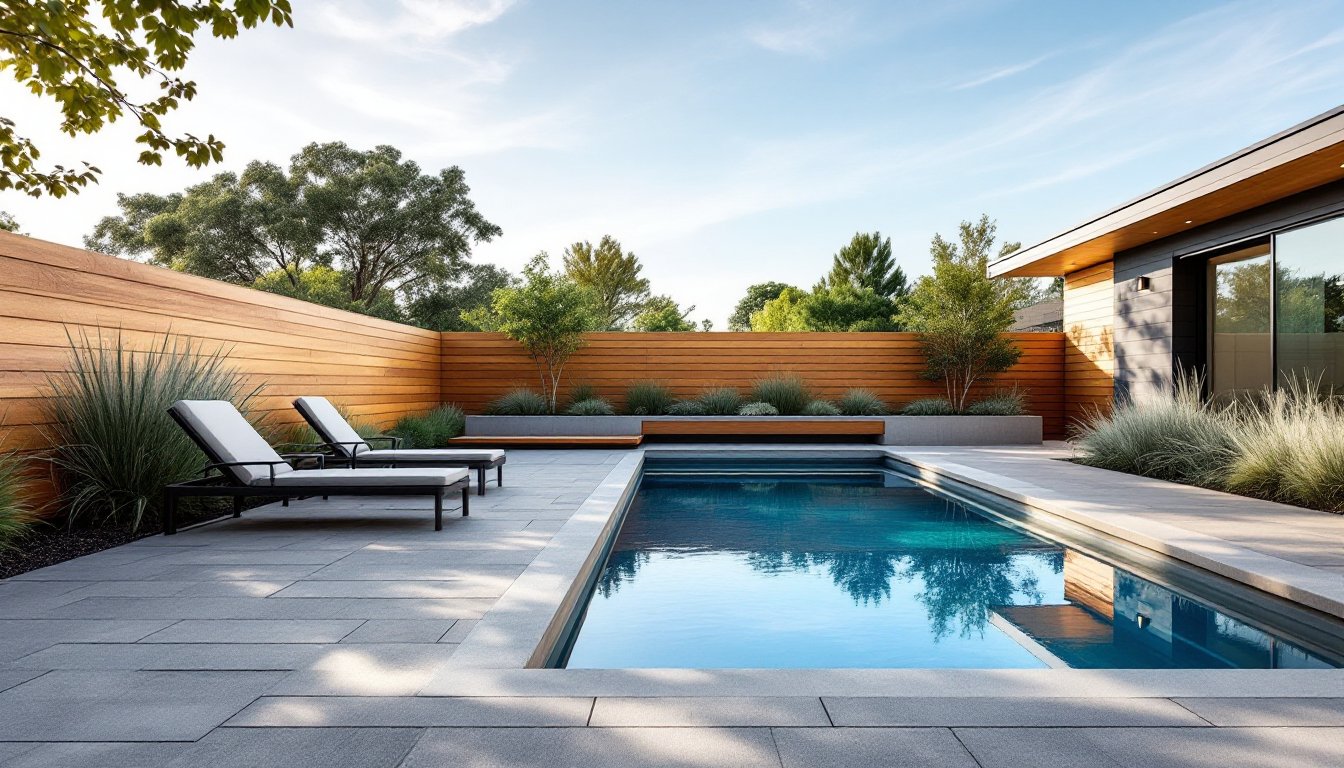
Why Position Your Outdoor Kitchen Near the Pool?
The primary advantage is convenience. Guests can grab drinks, snacks, or full meals without leaving the pool deck. This reduces wet footprints through the house and keeps social gatherings centralized in one outdoor zone.
A poolside kitchen also increases property value. Buyers often prioritize outdoor living spaces, and a well-designed kitchen adjacent to a pool signals a move-in-ready entertainment setup. It’s a selling point that stands out in listings.
From a practical standpoint, shared utilities simplify installation. If the pool area already has electrical, gas, or water lines, tapping into those existing systems can reduce trenching and permitting complexity. But, poolside placement does introduce challenges, moisture exposure, stricter electrical codes, and the need for slip-resistant surfaces, that require upfront attention.
Essential Design Considerations for Poolside Kitchens
Choosing Water-Resistant Materials
Materials need to withstand constant moisture, chlorine vapor, and temperature swings. Stainless steel is the go-to for appliances, countertops, and cabinetry frames, it resists rust and wipes clean easily. For countertops, granite, concrete, or porcelain tile handle moisture better than natural wood or laminate.
Cabinets should be marine-grade polymer or powder-coated aluminum, not standard plywood. Wood swells and rots in humid poolside environments, even with sealing. If a wood aesthetic is desired, use it for pergola beams or decorative accents, not structural cabinetry.
Flooring should be textured concrete, natural stone, or slip-resistant pavers. Smooth tile becomes dangerously slippery when wet. Many poolside kitchen designs prioritize non-slip surfaces to prevent accidents during peak use.
Optimal Layout and Distance from Pool Edge
Most building codes and pool safety regulations require a minimum setback of 5 to 10 feet from the pool edge for any structure with electrical or gas connections. This buffer reduces the risk of accidental contact between water and live circuits, and provides space for pool maintenance access.
Layout should follow the work triangle principle: grill, prep surface, and refrigerator positioned within a few steps of each other. In a linear galley-style setup, place the grill at one end, prep counter in the middle, and storage or a beverage fridge at the other. This keeps traffic flow logical and prevents bottlenecks during parties.
Consider wind direction when positioning the grill. Smoke blowing toward seating or into the pool creates an uncomfortable environment. If prevailing winds are predictable, orient the grill to vent away from gathering areas.
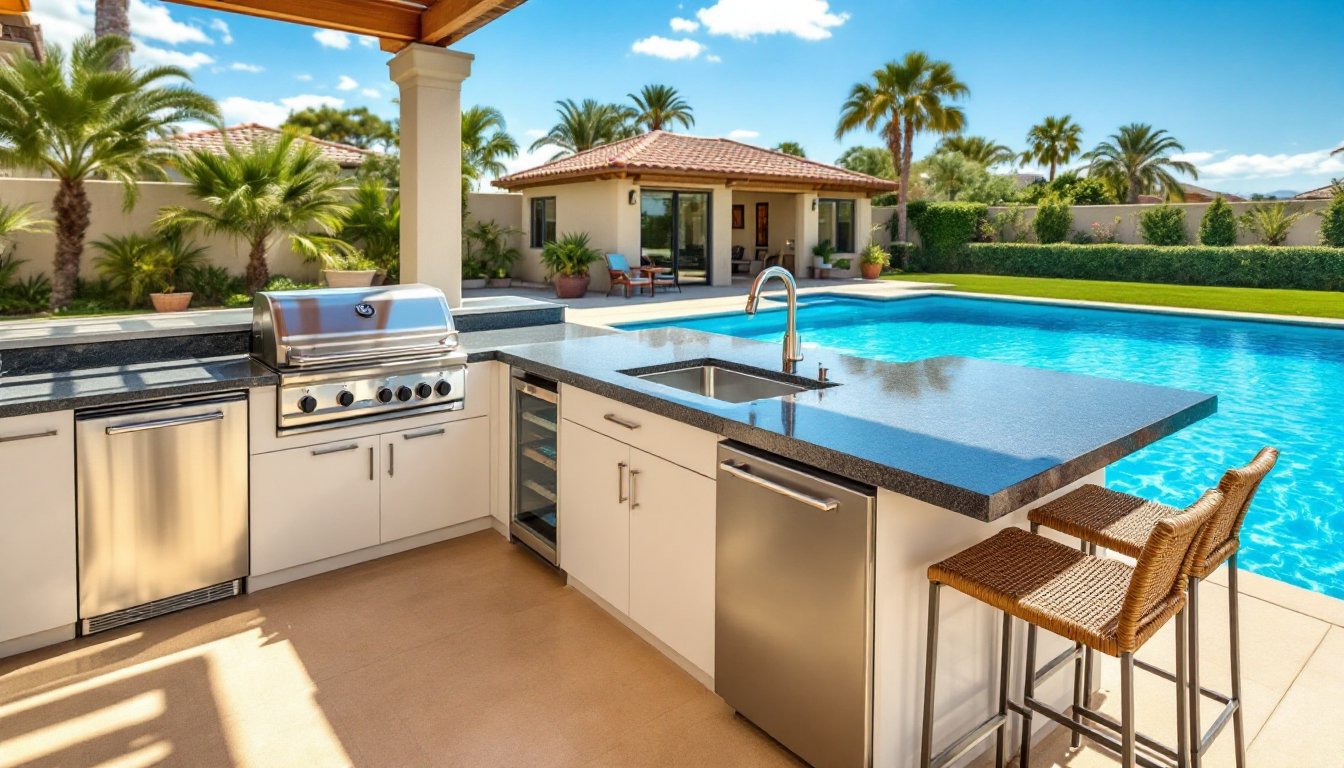
Must-Have Features for Your Pool-Adjacent Outdoor Kitchen
Start with a built-in gas or charcoal grill. Built-ins integrate cleanly and free up deck space compared to freestanding models. Gas grills need a propane tank enclosure or a natural gas line, running gas lines typically requires a licensed plumber and a permit.
Refrigeration is essential for keeping beverages cold and food safe. Outdoor-rated refrigerators and ice makers are built to handle temperature extremes and humidity. Standard indoor units will fail quickly in an outdoor environment.
Include a prep sink with hot and cold water. This eliminates trips indoors for rinsing produce or washing hands. The sink requires both water supply lines and a drain connection, which may involve trenching or tying into existing pool plumbing. Check local codes, some jurisdictions require a grease trap or backflow preventer for outdoor sinks.
Covered storage protects dishes, utensils, and grilling tools from the elements. Marine-grade cabinets with stainless steel latches stand up to humidity and keep pests out.
Adding a bar counter with seating turns the kitchen into a social hub. Standard counter height is 36 inches, bar height is 42 inches. Allow 24 inches of width per seat for comfortable spacing.
For evening use, install weatherproof task lighting above prep areas and ambient lighting along pathways. LED strips under counters or inside cabinets add function and visual appeal. Many functional poolside setups incorporate lighting zones controlled by dimmers for flexibility.
Safety Tips for Building Near Water
Electrical safety is non-negotiable. All outlets within 20 feet of a pool must be GFCI-protected per the National Electrical Code (NEC). GFCI outlets detect ground faults and cut power instantly, reducing shock risk. Hire a licensed electrician for any wiring, DIY electrical work near water is dangerous and often illegal without permits.
All electrical boxes, switches, and junction points should be weatherproof and rated for wet locations (NEMA 4X or higher). Standard indoor boxes will corrode and fail.
Gas lines require similar caution. Use black iron or CSST (corrugated stainless steel tubing) for runs, not flexible rubber hose. Gas connections should be inspected and pressure-tested by a licensed professional. A gas leak near an open flame is a serious hazard.
Ensure proper ventilation for grills and any enclosed cooking areas. Built-in grills under a solid roof or inside a pergola need adequate clearance, typically 30 inches minimum on all sides, to prevent heat buildup and fire risk. Check the grill manufacturer’s specs.
Slip-resistant flooring is critical. Wet feet and smooth tile are a recipe for falls. Use brushed concrete, textured stone, or pavers with a slip rating of at least 0.60 (dynamic coefficient of friction).
Keep a fire extinguisher rated for grease fires (Class K or ABC) mounted within reach. Pool areas with open flames and cooking grease need quick access to suppression tools.
Budget-Friendly DIY Ideas vs. Professional Installation
DIY-friendly components:
- Modular outdoor kitchen frames or kits: Companies sell prefabricated frames that accept standard grill and appliance cutouts. These simplify construction and reduce the need for custom masonry work. Expect to spend $1,500 to $4,000 for a basic modular setup.
- Concrete countertop forms: DIYers with experience in concrete can pour their own countertops using form kits. This cuts material costs significantly compared to fabricated stone.
- Freestanding carts and prep tables: Stainless steel carts provide mobile workspace and storage without permanent installation. They’re ideal for renters or anyone testing a layout before committing to built-ins.
- Paver or flagstone flooring: Laying pavers over compacted gravel base is a manageable weekend project for most homeowners. A 4-inch gravel base plus 1-inch sand leveling layer provides stable, well-draining support.
When to hire professionals:
- Gas line installation: This requires a licensed plumber or gas fitter in most jurisdictions. DIY gas work is unsafe and often voids homeowner’s insurance.
- Electrical wiring: Running circuits, installing GFCI protection, and ensuring NEC compliance near water should be handled by a licensed electrician.
- Plumbing for sinks: Trenching, tying into existing water lines, and installing drainage systems involve permits and inspections in many areas.
- Custom masonry or stonework: Building a durable, weather-resistant structure from block, brick, or stone demands experience with mortar, reinforcement, and proper drainage detailing.
Budget estimates vary widely by region and material choice. A basic DIY setup with a grill island and minimal appliances might run $3,000 to $7,000 in materials. A professionally installed full kitchen with high-end finishes, multiple appliances, and custom countertops can range from $15,000 to $50,000 or more. Regional labor rates, permitting fees, and site accessibility all influence final costs.
Before breaking ground, check local building codes and homeowner association rules. Some municipalities require setbacks from property lines, engineering stamps for structures over certain heights, or separate permits for electrical and plumbing work. Skipping this step can lead to costly teardowns or fines.
For design inspiration and material guidance, exploring curated poolside kitchen examples can help narrow down style preferences and feature priorities before finalizing plans.