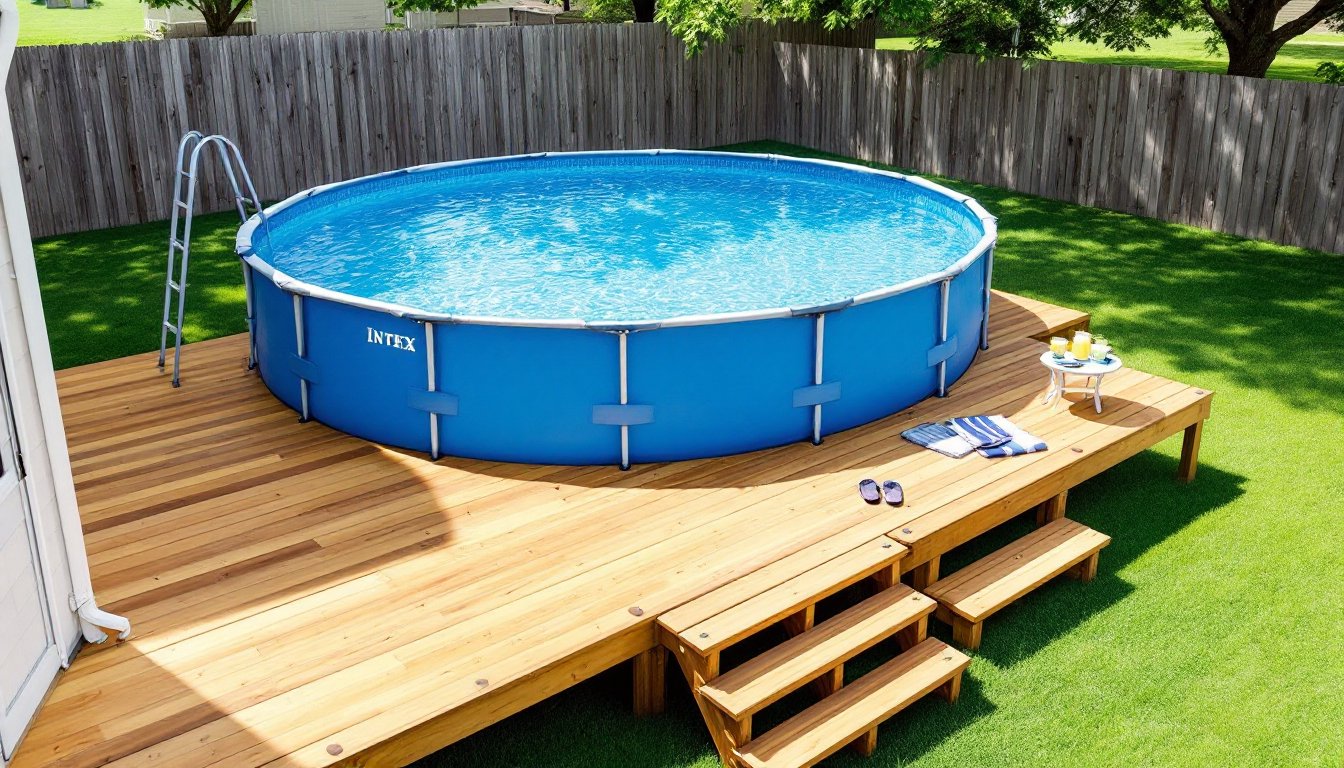
Above-ground Intex pools deliver instant summer fun, but they often feel like temporary fixtures stuck in the middle of a lawn. A well-built deck changes that completely. It elevates the pool’s appearance, provides stable access, and creates usable space for lounging, entertaining, or simply making entry and exit safer. Whether working with a tight budget or planning a multi-weekend build, the right deck design turns a utilitarian pool into a genuine backyard destination. The following ideas range from quick pallet projects to more ambitious composite builds, all sized for typical Intex pool diameters and achievable for motivated DIYers.
Table of Contents
ToggleKey Takeaways
- Intex pool deck ideas range from budget-friendly pallet projects to durable composite builds, each offering distinct trade-offs between cost, longevity, and maintenance.
- A well-designed pool deck improves safety by providing stable access, enhances property aesthetics, and protects turf while hiding the pool’s vinyl walls and structural components.
- Pallet decks cost nearly nothing but last only 3–5 seasons, while pressure-treated lumber decks ($800–$1,200) offer 10+ years of life, and composite decking ($2,500–$4,000) provides 25+ years with zero staining or sealing.
- Most jurisdictions require permits for decks over 30 inches high and mandate fencing under the International Residential Code (IRC), so always verify local codes before building.
- Ground-level decks with integrated seating work best for shorter pool sidewalls and often skip permit requirements, while multi-level designs require professional footings below frost line and careful attention to stair codes.
- Proper planning, level foundations, and secure fasteners are non-negotiable for safety and longevity—skipping these basics or permits can create liability and code violations.
Why Add a Deck to Your Intex Pool?
Intex pools sit 30 to 52 inches off the ground depending on model size. Climbing a ladder with wet feet ranks low on the safety scale, especially for kids or older adults. A deck solves that.
Beyond access, decks provide a flat staging area for towels, drinks, and poolside seating without trampling grass into mud. They also hide the pool’s vinyl walls and structural straps, which improves sight lines from the house or patio.
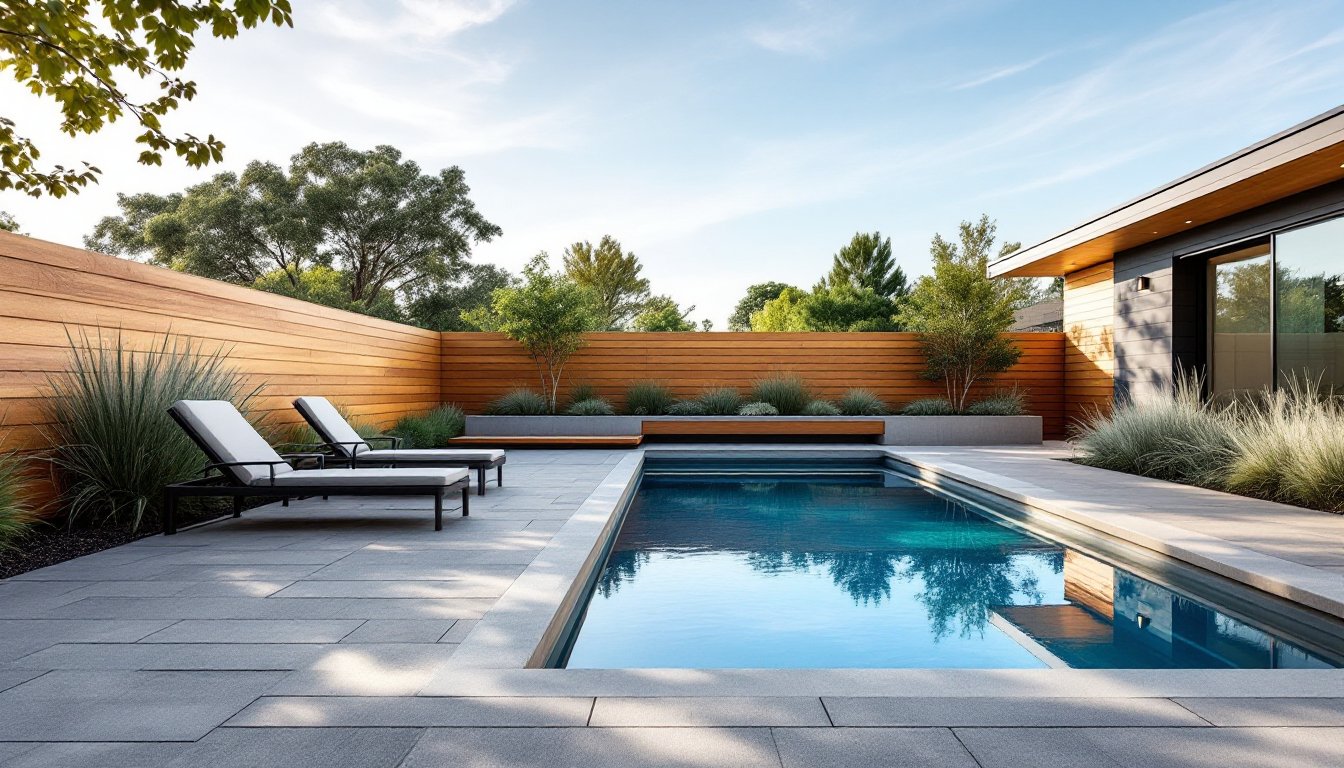
From a property standpoint, decks make above-ground pools look intentional rather than temporary. That matters if resale value or neighborhood aesthetics are considerations. A deck also distributes foot traffic, protecting turf and minimizing erosion around the pool perimeter.
Be aware: most jurisdictions require permits for decks over 30 inches high or attached to a dwelling. Freestanding decks under that height often fly under the radar, but verify local codes before cutting lumber. Pool decks also trigger fencing and gate requirements under the International Residential Code (IRC) to prevent unsupervised child access.
Budget-Friendly Wooden Pallet Deck
Shipping pallets offer the lowest entry cost for a functional pool deck. Standard 48×40-inch pallets can be sourced free or cheap from hardware stores, garden centers, or industrial parks. For a 12-foot round Intex pool, plan on 12 to 16 pallets to create an L-shaped or wraparound platform.
Materials:
- 12–16 heat-treated pallets (look for the HT stamp: avoid chemically treated MB pallets)
- 4×4 pressure-treated posts for leveling and support
- 3-inch exterior deck screws
- Landscape fabric and pea gravel for the base
- Exterior stain or sealer
Steps:
- Level the ground and lay landscape fabric to suppress weeds.
- Spread a 2-inch layer of pea gravel for drainage.
- Position 4×4 posts as footers, shimming with composite shims to achieve a level plane.
- Set pallets on the posts and screw them together at the stringers (the thick support boards underneath).
- Add a perimeter band of 2×4 or 2×6 lumber to box in exposed pallet edges and create a finished border.
- Sand rough spots, then apply two coats of exterior stain or water sealer.
Pros: Fast to assemble, extremely low cost, easy to dismantle and relocate.
Cons: Pallet lumber splinters easily and won’t last more than 3–5 seasons even with sealer. Not suitable for decks over 24 inches high due to structural limitations.
Keep pool maintenance routines consistent to prevent water damage to the deck.
Classic Pressure-Treated Lumber Deck
Pressure-treated southern yellow pine remains the workhorse of DIY deck construction. It’s affordable, widely available, and rated for ground contact. For an Intex pool deck, a simple rectangular or octagonal frame with 2×6 decking over 2×8 joists handles the load and looks clean.
Materials:
- 4×4 pressure-treated posts (footers)
- 2×8 pressure-treated joists (16-inch on-center spacing)
- 2×6 pressure-treated decking boards
- Galvanized joist hangers and structural screws
- Concrete deck blocks or poured footings
- Exterior wood stain
Steps:
- Lay out the deck footprint using stakes and string. For a 15-foot round pool, a 20×20-foot square or octagon works well.
- Set concrete deck blocks or pour footings below frost line (depth varies by region, check local frost depth maps).
- Anchor 4×4 posts to footings, ensuring they’re plumb and level.
- Attach 2×8 rim joists to form the outer frame, then install interior joists with joist hangers at 16-inch intervals.
- Run 2×6 decking perpendicular to joists, leaving a 1/8-inch gap between boards for drainage and expansion.
- Countersink screws slightly to avoid snags, then apply stain once the wood has dried for 4–6 weeks post-construction.
A miter saw makes precise angle cuts for octagonal designs: a circular saw with a guide works but requires more layout care. Expect around $800–$1,200 in materials for a 300-square-foot deck, depending on regional lumber pricing and whether treated lumber is kiln-dried after treatment (KDAT), which costs more but resists warping better.
Safety note: Wear gloves and a dust mask when cutting pressure-treated lumber. The copper-based preservatives are low-toxicity but still an irritant. When finished, regular pool cleaning habits keep the deck free of algae and slippery buildup.
Composite Decking for Low-Maintenance Luxury
Composite decking, typically a blend of recycled wood fiber and plastic resin, costs two to three times more than pressure-treated lumber but pays off in longevity and ease of care. It won’t splinter, rot, or require annual staining. Brands like Trex, TimberTech, and Fiberon dominate the market, each offering capped (protective shell) and uncapped versions.
Materials:
- Composite decking boards (typically 1×6 or 5/4×6 profiles)
- Pressure-treated 2×8 joists (composite joists are available but add cost)
- Hidden fastener clips (brand-specific)
- Concrete footings and 4×4 posts
- Composite fascia boards to wrap the rim
Many design inspiration galleries showcase composite pool decks in a range of colors, from gray weathered oak to warm Brazilian walnut tones.
Steps:
- Frame the deck using pressure-treated lumber following the same joist layout as a wood deck (16-inch on-center).
- Install the first composite board with face screws along the house side or starting edge.
- Use hidden fastener clips for subsequent boards, these engage the board’s grooved edges and leave a clean surface with no visible screws.
- Leave the manufacturer’s recommended gap (usually 1/4 inch end-to-end, 1/8 inch side-to-side) to allow for thermal expansion.
- Wrap exposed joists with composite fascia for a finished look.
Pros: 25+ year lifespan, no staining or sealing, splinter-free, wide color selection.
Cons: Higher upfront cost ($2,500–$4,000 for a comparable 300-square-foot deck), can get hot in direct sun (especially darker colors), and requires specific fasteners and techniques to avoid voiding warranties.
Maintaining a proper weekly pool service routine minimizes composite deck staining from chlorine or algae overspray.
Ground-Level Deck With Integrated Seating
For pools with lower sidewalls (24 to 36 inches), a ground-level deck simplifies construction and often skips permit requirements. Adding built-in benches or L-shaped seating transforms the deck into a true hang-out zone without needing separate furniture.
Materials:
- 2×8 or 2×10 joists for the main deck frame
- 2×6 or 2×4 decking boards
- 2×4 and 2×6 framing for bench boxes
- Gravel base and landscape fabric
- Concrete deck blocks (no digging required)
Steps:
- Clear and level the site, then lay landscape fabric and spread 2–3 inches of gravel.
- Set deck blocks in a grid pattern to support the perimeter and interior joists.
- Build the main deck frame with 2×8 rim joists and cross joists, resting directly on the blocks.
- Attach decking boards.
- Frame bench seats using 2×4 studs to create a box 18 inches high and 16–18 inches deep (standard seat dimensions).
- Cap the bench frame with 2×6 boards for the seat surface and backrest (angled at 10–15 degrees for comfort).
Built-in seating saves floor space and provides a spot to sit at water level, ideal for dangling feet while supervising swimmers. It also adds storage potential underneath if you hinge the seat tops.
Ground-level decks work best on flat lots. If the yard slopes, expect to shim extensively or switch to a post-and-beam design. Project ideas from home improvement platforms often feature modular bench designs adaptable to various deck shapes.
Multi-Level Deck Design With Steps and Platforms
For larger Intex pools (18 feet round or 24-foot oval) or sloped yards, a multi-level deck creates visual interest and functional zones, one level for entry, another for lounging, possibly a lower tier for grilling or a hot tub.
Materials:
- 4×4 or 6×6 pressure-treated posts
- 2×10 joists for the upper level (greater span capacity)
- 2×8 joists for lower platforms
- 2×12 stair stringers (pre-cut or job-built)
- Galvanized hardware (joist hangers, post caps, stair brackets)
- Concrete footings (required for structural decks over 30 inches)
Steps:
- Lay out levels on paper first, calculating elevation changes and stair rise/run (IRC code calls for 7.75-inch max rise, 10-inch min run).
- Dig footings below frost line and pour concrete. Set post anchors while concrete is wet.
- Attach posts and build the highest platform first, using 2×10 joists with joist hangers.
- Frame the lower level(s), tying into the upper deck with structural screws or bolts.
- Cut stair stringers from 2×12 lumber (a framing square and stair gauges make layout easier). Secure stringers to the deck frame with stair brackets.
- Install treads (two 2×6 boards per step) and risers if desired.
- Add railings where any section exceeds 30 inches above grade (IRC requirement). Balusters must be spaced no more than 4 inches apart to prevent child entrapment.
Tools: A circular saw handles most cuts, but a miter saw speeds up repetitive angle work. Rent a post-hole digger or auger if digging more than four footings.
Permits and inspections: Multi-level decks almost always require permits and at least one inspection (footing, framing, final). Budget extra time, some jurisdictions take weeks to schedule inspections.
Keep pathways around the pool clear to make pool wall maintenance easier without navigating multiple levels. Establish a plan to keep pool water clean as debris tends to accumulate in corners of multi-level designs.
Conclusion
A deck turns an Intex pool from a seasonal inflatable into a legitimate backyard feature. Whether opting for reclaimed pallets, classic pressure-treated framing, or composite luxury, the key lies in solid planning, level foundations, and honest assessment of skill level. Don’t skip permits where required, and remember that safety railings, proper joist spacing, and secure footings aren’t suggestions, they’re code. With the right approach, a DIY pool deck delivers years of easier access, better aesthetics, and a space that actually feels like a destination rather than a placeholder.