Half baths pack outsized impact into minimal square footage. These compact spaces, typically 20 to 40 square feet, get seen by guests more than any other room except the entryway, yet they’re often treated as an afterthought. The walls are where the magic happens. With roughly 60 to 80 square feet of vertical real estate in a standard half bath, smart wall treatments can shift the entire vibe from builder-grade bland to memorable. This guide walks through proven wall decor strategies that balance style with the practical constraints of tight quarters, high humidity, and limited natural light.
Table of Contents
ToggleKey Takeaways
- Half bath wall decor transforms compact 20-40 square foot spaces into memorable first impressions by leveraging 60-80 square feet of vertical surface area with strategic design choices.
- Oversized statement pieces (24×36-inch framed art) and properly mounted mirrors work better than multiple small items, especially when positioned at eye level (60-65 inches from floor) opposite the entry door.
- Moisture-resistant materials—sealed wood frames, vinyl wallpaper, and treated wood shelving—prevent warping and mold in humid powder rooms without showers.
- DIY half bath wall decor projects like picture frame molding ($75 budget), painted stencil accents, and floating shelves maximize style while requiring only basic tools and a weekend of work.
- Proper mounting hardware (stud location, toggle bolts for heavy pieces, hollow-wall anchors) and level installation prevent both safety issues and the visual mistakes that become glaring in small spaces.
- Avoid overcrowding by selecting one focal point per wall—either a bold wallpaper, statement mirror, or gallery arrangement—and maintain 21+ inches of clearance from toilet fixtures for code compliance.
Why Half Bath Wall Decor Matters More Than You Think
Half baths sit at the intersection of function and first impressions. Unlike primary bathrooms where cabinetry and fixtures dominate, powder rooms often feature a pedestal sink and toilet, leaving walls as the primary canvas.
The psychological effect is real. A well-executed wall treatment signals attention to detail throughout the home. Conversely, bare drywall or a single off-center mirror broadcasts missed opportunity.
From a practical standpoint, half baths rarely include windows. Wall decor compensates for absent natural light and architectural interest. Vertical elements draw the eye upward, making low ceilings feel taller, a crucial trick in spaces where standard 8-foot ceilings can feel compressed.
Moisture is less aggressive here than in full baths (no shower steam), but humidity still matters. Select materials rated for bathroom use: moisture-resistant drywall, properly primed surfaces, and sealed wood elements prevent warping and mold growth down the line.
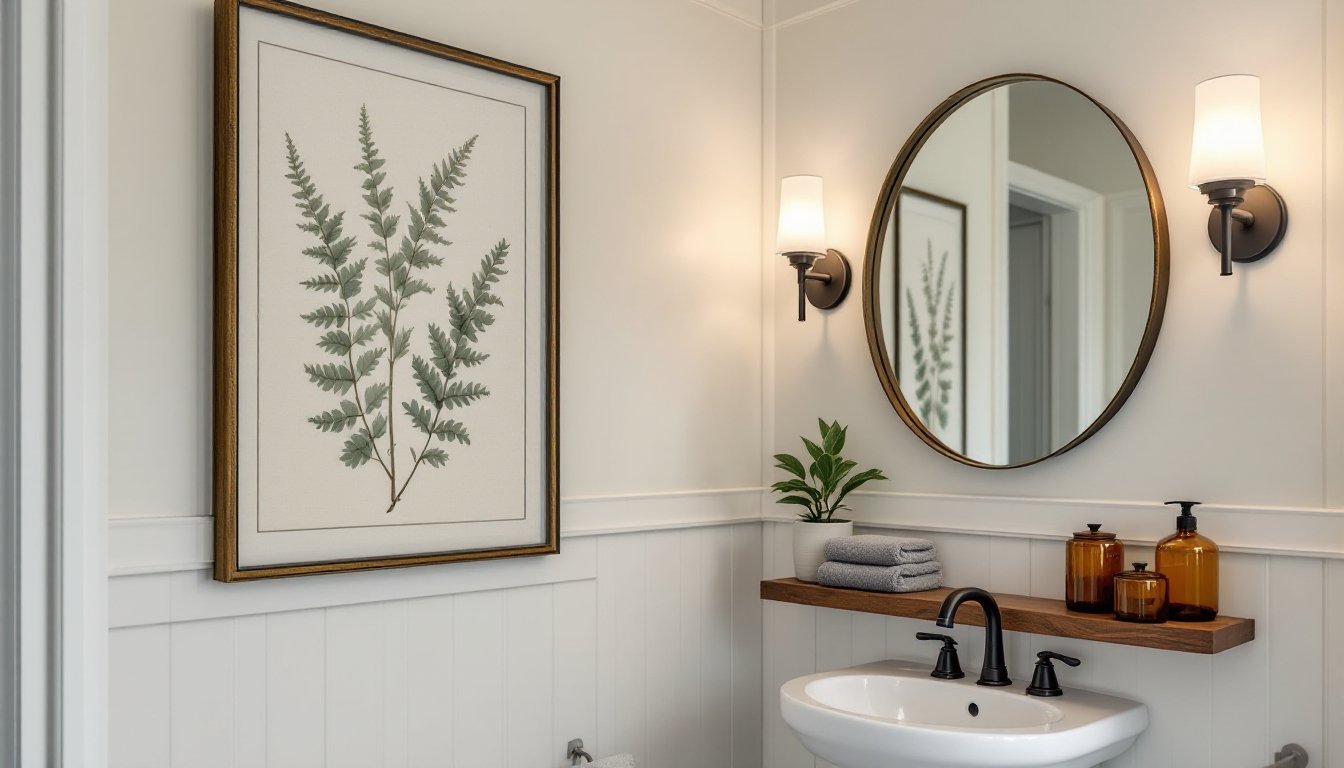
Statement Wall Art and Gallery Displays
Single large-scale pieces work better than you’d expect in tight quarters. A 24×36-inch framed print or canvas commands attention without overwhelming the space. Position it at eye level (60 to 65 inches from floor to center) on the wall opposite the door, the first thing guests see when entering.
Frame selection matters. In high-humidity environments, sealed wood or metal frames outlast particle board composites. If using matting, ensure the backing board is acid-free and moisture-resistant. Standard glass works fine: skip anti-glare coatings unless dealing with direct window light.
Gallery walls demand careful planning in half baths. Limit arrangements to 3-5 pieces max. More creates visual clutter in spaces where someone’s standing 18 inches from the wall. Use a paper template system: trace frames on kraft paper, tape them up, adjust until the composition works, then mark nail holes through the paper.
Mounting hardware needs to hit studs or use proper hollow-wall anchors. Standard studs sit 16 inches on center. A stud finder (magnetic or electronic) prevents guesswork. For frames under 10 pounds, plastic anchors rated for drywall suffice. Heavier pieces require toggle bolts or molly bolts.
Abstract art and botanical prints remain popular choices in 2026, but rule-breakers thrive here. Vintage maps, framed textile samples, or even a single architectural salvage piece (an old corbel, decorative tile) can anchor the space. Design platforms like Houzz showcase thousands of real installations for scale reference.
Functional Decor: Mirrors, Shelves, and Storage Solutions
Mirrors do double duty: they’re code-required functional elements that also bounce light around windowless spaces. Oversized mirrors (30 to 48 inches wide) make small half baths feel twice the size. Mount them 4 to 6 inches above the sink backsplash, ensuring the center sits at average eye height.
Framed mirrors add architectural weight. A 2-inch frame in matte black, aged brass, or natural wood introduces material contrast against painted drywall. For DIY installation, use mirror clips rated for the mirror’s weight plus 20% safety margin. Pre-drill pilot holes to prevent drywall cracking.
Round mirrors, particularly 30 to 36-inch diameters, soften angular spaces dominated by rectangular fixtures. Hang them using a French cleat system for heavy pieces (over 20 pounds) or D-rings with picture wire for lighter versions.
Floating shelves maximize vertical space without visual bulk. Install them 12 to 18 inches above the toilet tank for practical storage of extra toilet paper, hand towels, and decorative objects. Use ¾-inch hardwood or plywood cut to 8 to 10 inches deep and finished with polyurethane or water-based sealer.
Mounting requires concealed bracket systems or heavy-duty floating shelf hardware. Locate studs and use 3-inch wood screws into at least two studs per shelf. For walls without conveniently placed studs, a ledger board (1×3 or 1×4 mounted horizontally across studs) provides a solid backing.
Built-in niches recessed between studs (actual stud spacing: 14.5 inches between faces) add storage without stealing floor space. Cutting into drywall requires a utility knife, level, and reciprocating saw. Frame the opening with 2×4 blocking, install backer board, then tile or paint the interior. This crosses into moderate-difficulty territory, expect a full weekend for first-timers.
Exploring small half bath layouts helps identify which functional elements work best in specific footprints.
Texture and Dimension: Wallpaper, Paneling, and Accent Walls
Wallpaper has re-entered the mainstream with vinyl-coated and non-woven options that handle bathroom humidity. Peel-and-stick varieties simplify installation for DIYers but can telegraph wall imperfections. Proper surface prep, sanding, priming with acrylic primer, filling nail holes, determines outcome quality.
Pattern scale matters in small spaces. Large-scale prints (12 to 24-inch repeats) create drama without busy-ness. Narrow vertical stripes elongate walls. Calculate coverage before ordering: measure wall height and width, account for pattern repeat, and add 15% waste factor.
Installation requires a smoothing tool (plastic or felt-edged), sharp utility knife, level, and seam roller. Start from the least visible corner, work toward the door, and overlap seams slightly before trimming. Most failures stem from rushing, wallpaper needs to “relax” for 5 to 10 minutes after wetting (for paste-the-wall types) before positioning.
Board-and-batten or wainscoting adds architectural detail and protects lower walls from scuffs. Standard wainscoting height: 32 to 36 inches from the floor. Use 1×4 boards for vertical battens spaced 12 to 16 inches apart, with a 1×6 cap rail and 1×3 base trim.
Attach boards to studs using 2-inch finish nails or a brad nailer (18-gauge brads work well). Fill nail holes with wood filler, caulk gaps between boards and wall, then prime and paint. Two coats of semi-gloss or satin paint provide scrubbable durability.
Shiplap (actual dimension: ¾×5.5 inches with a rabbet joint) creates horizontal lines that widen narrow spaces. Installation runs similar to board-and-batten: find studs, level the first board, nail through the face or tongue, work upward. Expect to spend $2 to $4 per square foot for pine shiplap, plus fasteners and finish.
Accent paint colors offer the simplest transformation. Deep jewel tones (navy, emerald, charcoal) work surprisingly well in small spaces, especially with white trim for contrast. Modern bath decor approaches often embrace bold color in powder rooms while keeping primary baths neutral.
Paint selection: acrylic latex with mildew inhibitors, satin or semi-gloss sheen. Coverage: approximately 350 to 400 square feet per gallon. Two coats minimum over properly primed surfaces.
Budget-Friendly DIY Half Bath Wall Decor Projects
Picture frame molding creates high-end paneling effects for under $75. Purchase 1×2 or 1×3 pine boards, cut to create rectangular frames on walls, then paint everything the same color. Measure and mark frame positions with painter’s tape first, ensuring consistent spacing (typically 4 to 6 inches from ceiling, baseboards, and each other).
Cut boards using a miter saw set to 45-degree angles at corners. A miter box and hand saw works but requires patience for clean cuts. Attach with construction adhesive and 1.25-inch finish nails, then caulk, prime, and paint.
Stenciled accent walls deliver pattern without wallpaper cost. Purchase or cut custom stencils from mylar sheets (more durable than plastic). Use high-density foam rollers and acrylic craft paint in small quantities. Tape the stencil flat, roll paint lightly (excess causes bleeding), reposition, repeat. A 40-square-foot wall takes 3 to 4 hours.
DIY floating frame gallery using dollar-store frames creates cohesion through uniformity. Spray-paint all frames identical colors (matte black, gold, white), insert coordinating prints, and arrange in a grid pattern. Total cost: $15 to $30 for 6 to 9 frames.
Wood bead garland or macramé wall hangings add texture without tools. Drape large wood bead garlands (2 to 3-inch beads) on existing hooks or nails. Macramé pieces work well flanking mirrors or above toilet tanks. Both tolerate humidity better than fabric art.
Painted terra cotta wall planters introduce greenery vertically. Mount 2 to 4-inch terra cotta pots on small L-brackets or use adhesive-backed plate hangers. Plant low-light tolerant species: pothos, snake plants, or ZZ plants. Water sparingly, overwatering in humid spaces promotes mold.
Apartment Therapy for hundreds of budget makeover examples with material breakdowns and cost tracking.
Common Mistakes to Avoid When Decorating Half Bath Walls
Ignoring scale tops the list. Furniture-scale items (oversized clocks, massive mirrors intended for living rooms) overwhelm powder rooms. Conversely, tiny 5×7-inch frames get lost. Aim for pieces that fill roughly one-third to one-half of available wall width.
Skipping moisture barriers behind wall treatments causes premature failure. Use moisture-resistant drywall (green board or purple board) in half baths, especially on exterior walls. Prime all surfaces with stain-blocking primer before painting or papering.
Improper mounting hardware leads to damaged walls and fallen decor. Match anchor type to wall material and load. For walls with tile patterns, use carbide-tipped masonry bits and plastic anchors designed for tile, never adhesive strips.
Neglecting lighting undermines otherwise solid design. Overhead lighting alone creates harsh shadows. Add sconce lighting flanking mirrors (12 to 18 inches from mirror edges, 60 to 65 inches from floor) for even illumination. Electrical work requires turning off circuits at the breaker panel: if adding new circuits, hire a licensed electrician. Most jurisdictions require permits for new electrical runs.
Forgetting clearance requirements creates code violations and usability issues. Maintain minimum 21 inches from the toilet front to any wall or fixture (24 inches preferred). Door swings need clearance, verify the door won’t hit wall-mounted items when opening.
Using untreated wood in direct contact with moisture invites warping and rot. Seal all wood elements with polyurethane or water-based sealer (two coats minimum). Let each coat cure fully (4 to 6 hours) before the next.
Overcrowding walls with multiple competing elements fractures visual flow. Choose one focal point per wall: either a statement mirror, bold wallpaper, or gallery arrangement, not all three. Designers on Remodelista consistently emphasize restraint in small-space design.
Installing without leveling produces noticeably crooked results in tight spaces. Use a 24-inch level or longer for shelves and horizontal elements. A laser level ($30 to $50) simplifies alignment for multi-piece installations.
Conclusion
Half bath walls offer concentrated opportunities for creative expression without the commitment of larger spaces. Whether installing board-and-batten, hanging an oversized mirror, or papering an accent wall, the key lies in thoughtful scale, proper materials, and solid mounting technique. Start with one focal element, ensure it’s level and secure, then build around it. Most projects require only basic tools and a weekend, but deliver years of elevated style every time someone closes that powder room door.